


Creating a Windows app in HTML, CSS, jQuery & PHP using TideSDK
TideSDK is a software development kit which enables you to create desktop apps that work on different operating systems (Windows, Linux and Mac) using HTML5, CSS3 and JavaScript. You can basically include any library you want when using those languages (such as jQuery, Foundation, Bootstrap). Furthermore, you can use server-side languages such as PHP, Ruby or Python when making your application.

You should also follow the development on TideKit.
In this practical tutorial, we are going to create a simple Windows app that fetches data from my homepage (which has dynamically generated content) and displays it.
1. Installation
You can install TideSDK from https://github.com/TideSDK/TideSDK/downloads. Choose the version of the archive that is compatible with your operating system and open it. Now, TideSDK must be installed in a particular folder – you cannot install it wherever you want.
If you are using Windows 7, unzip it in: C:\ProgramData\TideSDK
If you are using Windows XP , install it in: C:\Documents and Settings\All Users\Application Data\TideSDK
If you are using Linux, install it in: ~/.tidesdk
And if you are using Mac: install it in: ~/Library/Application Support/TideSDK
You can see TideSDK’s documentation here: http://tidesdk.multipart.net/docs/user-dev/generated/
Then, you can install TideSDK Developer to easily package and test your apps. Basically, you can do those things without TideSDK Developer but it costs more time and requires some learning.
TideSDK Developer is located in the following public repository in GitHub: https://github.com/TideSDK/TideSDK-Developer
You can issue a git clone https://github.com/TideSDK/TideSDK-Developer.git or just open the site click on ‘Download ZIP’
You would need Python 2.7+ which you can download from https://www.python.org/downloads/.
You would also need Wix 3.0 (https://wix.codeplex.com/releases/view/44406) and ImageMagick (http://www.imagemagick.org/script/binary-releases.php#windows) if you are using Windows.
You would have to build TideSDK developer and then you can use it any time you want.
There are examples of the different ways of packaging applications in the TideSDK’s developer readme file and you can find detailed information of packaging with TideSDK at: https://github.com/TideSDK/TideSDK/wiki/Packaging-TideSDK-apps
Once you have built TideSDK Developer you can create a new project or change an existing one from the following GUI:

You have to say which language models you want included or else you would be able to develop the applications only with HTML,CSS and JavaScript.
In the Test & Package tab you launch the application or package it with runtime.
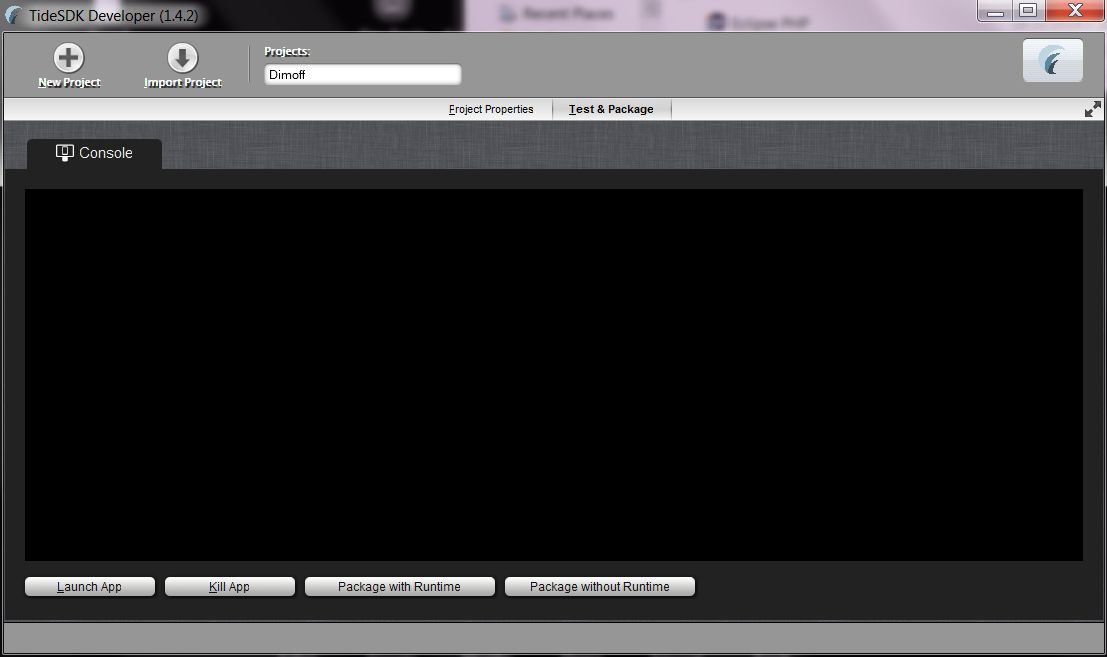
Creating a new project will set up all basic files necessary for the project such as the manifest and tiap.xml.
The most important thing in tiap.xml is setting the proper index of your application: <url>app://index.php</url>
There is a different <url> element for the app itself and the one that controls the index of your app should be nested within the <window> element.
When using TideSDK you use app:// to point to the root directory. If you add an index.php file and delete the index.html your app will not work because the url element’s value is unchanged and the app is not finding your index.
You can also set up things such as whether the app’s window is resizable, its maximum and minimum widths and heights, the title of the app and others. Here is the snippet that I used:
<ti:app xmlns:ti="http://ti.appcelerator.org">

<id>biz.dimoff</id>
<name>Dimoff</name>
<version>1.0</version>
<publisher>Ivan Dimov</publisher>
<url>http://www.dimoff.biz</url>
<icon>app.png</icon>
<copyright>Ivan Dimov 2014</copyright>

<window>
<id>initial</id>
<title>Dimoff</title>
<url>app://index.php</url>
<width>700</width>
<max-width>3000</max-width>
<min-width>0</min-width>
<height>500</height>
<max-height>3000</max-height>
<min-height>0</min-height>
<fullscreen>false</fullscreen>
<resizable>true</resizable>
<chrome scrollbars="true">true</chrome>
<maximizable>true</maximizable>
<minimizable>true</minimizable>
<closeable>true</closeable>
</window>
</ti:app>
Our actual app goes in the Resources directory.
Here is our index page:
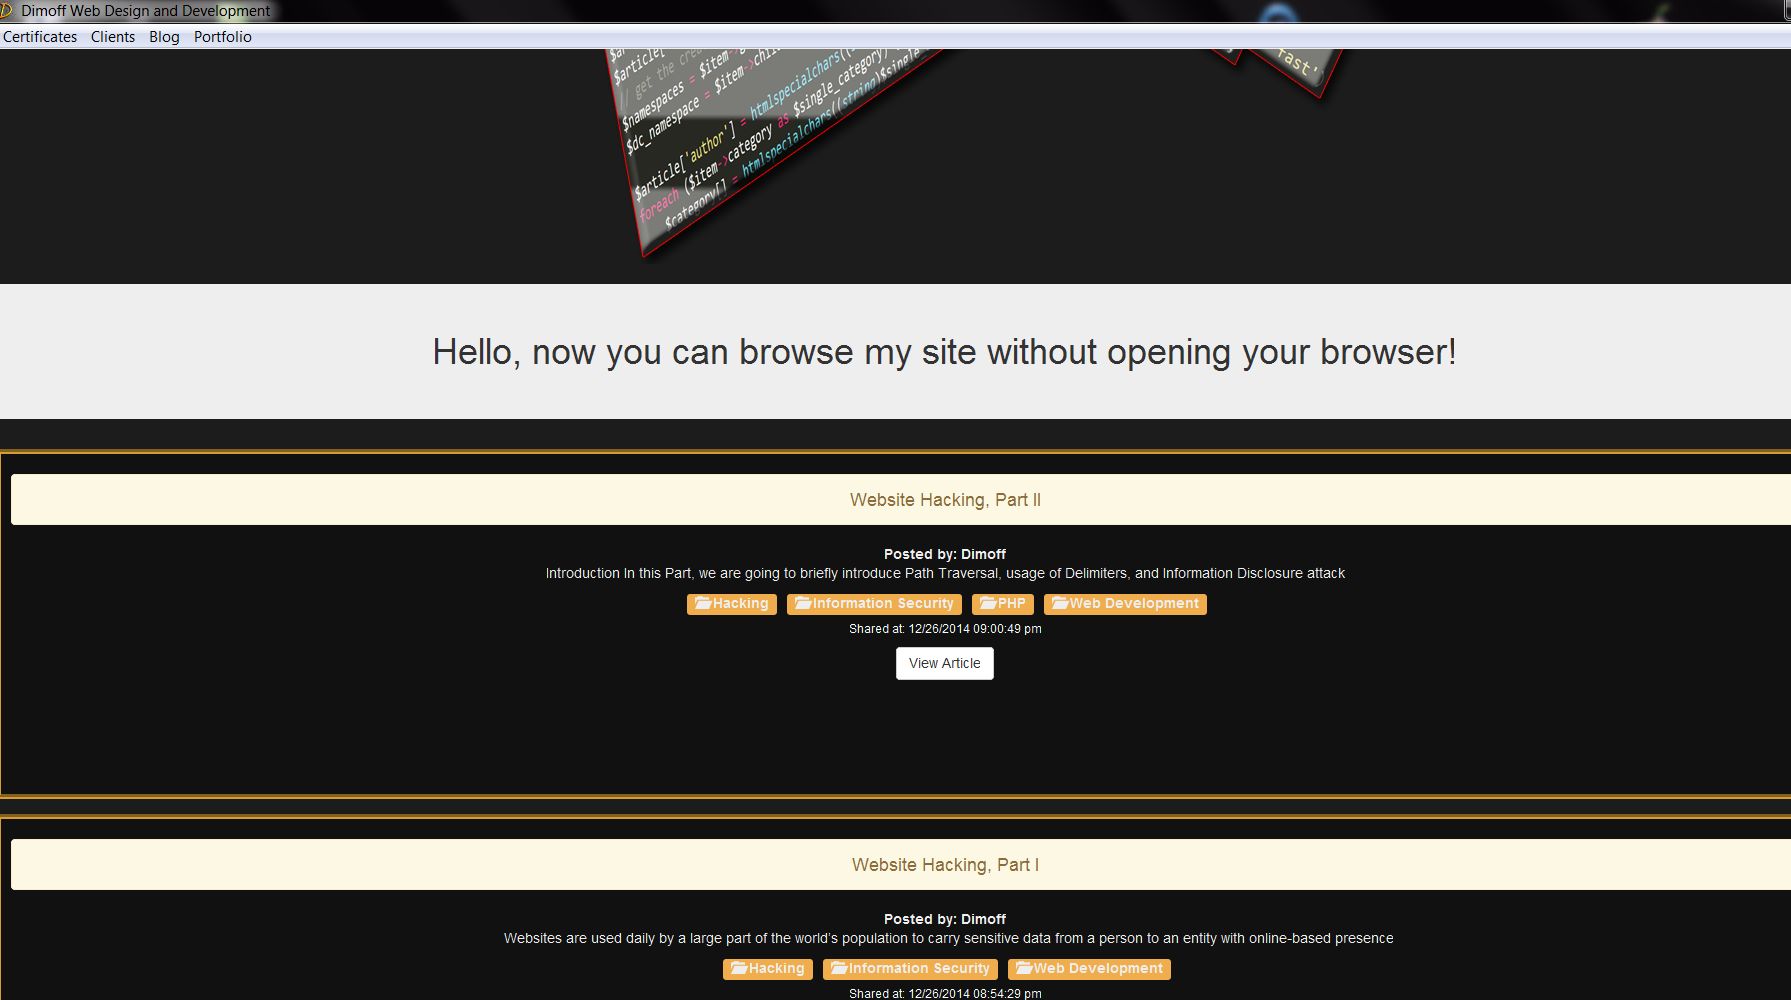
<html>
<head>
<meta charset="utf-8">
<title>Dimoff Web Design and Development</title>
<link rel="stylesheet" href="app://css/bootstrap.css">
<script src="app://jquery.min.js"></script>
<script src="app://menu.js"></script>
<link rel="stylesheet" href="app://css/styles.css">
</head>
<body style="background-color:#1c1c1c;margin:0;">
<img src="http://www.dimoff.biz/img/myLogo.png" class="" style="max-width: 60%;display:block; margin: 0 auto;">
<h1 class="jumbotron text-center">Hello, now you can browse my site without opening your browser!</h1>
<div id="content">

</div>
<script>

</script>
</body>
</html>
You can see we are loading local versions of bootstrap, jquery, a custom js and css file and displaying a little bit of markup as well as loading an image directly from my website.
To create a menu we use: var menu = Ti.UI.createMenu() ;
To add the menu to the app we use: Ti.UI.setMenu(menu);
To add items to the menu we use: var goodiesItem = Ti.UI.createMenuItem(‘Goodies’).
We can directly add a behavior to that menu item or add sub-items which will have a behavior.
To add direct behavior to the main menu element you can use:
var goodiesItem = Ti.UI.createMenuItem('Goodies', function() {
//do something
});
To add a child to a menu item which will have a behavior you can use:
easyItem = goodiesItem.addItem('Easy?', function() {
// do something
});
Then, you have to add each top level parent item to the menu by accessing the appendItem method on the menu object that you set up with Ti.UI.createMenu().
menu.appendItem(goodiesItem);
In our sample application, we used the following custom js file:
var data;

//load the menu when fetch.php has given us the contents of the home page
$.get("fetch.php", function(pageData) {
	data = pageData;


//get the relevant section for each menu item by calling getSection with the class name of the entries

var menu = Ti.UI.createMenu(),
certificateItem = Ti.UI.createMenuItem('Certificates', function() {
	getSection(".certificate-entry");


}),
portfolioItem = Ti.UI.createMenuItem('Portfolio', function() {
	getSection(".portfolio-entry");


	}),
blogItem = Ti.UI.createMenuItem('Blog', function() {

	getSection(".blog-entry");


}),
clientItem = Ti.UI.createMenuItem("Clients", function() {
	 getSection(".client-entry");


})


menu.appendItem(certificateItem);
menu.appendItem(clientItem);
menu.appendItem(blogItem);
menu.appendItem(portfolioItem);
Ti.UI.setMenu(menu);

});

// get only the data about the particular section, replace the paths of the images in order to load them remotely, show the entries and scroll to them
function getSection(section) {
	 var page = $(data).find(section);

	$.each(page.find("img"), function(i,val) {
		oldSrc = $(val).parent().attr('href');
		$(val).attr("src", "http://www.dimoff.biz" + oldSrc);
	})
	$("#content").children().fadeOut(1300).remove();
	$("#content").append(page);
	$("body").animate({"scrollTop" : $("#content").offset().top});


}
You can see we are fetching data from the loaded page when a menu button is clicked, getting only the entries that correspond for each button. Before adding the markup to the page we are changing the src attribute of the images in order for them to be loaded successfully from local environment , we show the entries and scroll to the newly generated content.
The fetch.php just fetches the homepage:
<?php

   echo file_get_contents("https://www.phpgang.com");

?>
Here are images of how the app looks like with some basic CSS:

The installer of the app is included. Although you can run it as an app, there is a Resources directory so you will have access to the source code.
You now can create a simple app that fetches dynamic data from a website and shows it.
The next step is to go ahead and practice creating your own desktop app!
Tutorial Categories:


Super article I really like this and now developing windows app.
what for win8 ?
It works on Windows 8. Just as in Windows 7, you need to install it in C:ProgramDataTideSDK. See http://www.tidesdk.org/blog/2012/11/16/1-dot-3-1-beta-release-announcement/ for more details.
awesome tutorial
This is not working now.. The system shows no SDK installed. What i can do to rectify this issue
Or this is a very old text or the author knows something that we don’t know. TideSDK and TideKit are dead projects, from a long time ago…
Or this is a very old text or the author knows something that we don’t know. TideSDK and TideKit are dead projects, from a long time ago…
Does it run the app without php servert installed on your system.?? I am new to TIDESDK