


Image Upload and Resize using Image Intervention in Laravel
In this tutorial we will cover one of the most used feature Image Upload functionality in any web application over Internet using Laravel 4 and Image Intervention package. Let’s see how we can do Image upload and resizing by allowing people to upload images to our website via a From.
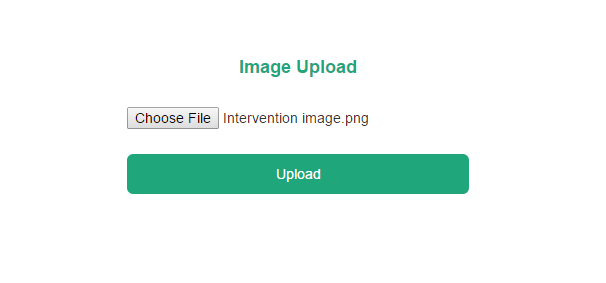
Image Upload Form
Let’s create a view which will contain our upload form with name form.blade.php in app/views/ directory.
<!-- Latest compiled and minified CSS -->
<link rel="stylesheet" href="https://maxcdn.bootstrapcdn.com/bootstrap/3.3.1/css/bootstrap.min.css">

<!-- Optional theme -->
<link rel="stylesheet" href="https://maxcdn.bootstrapcdn.com/bootstrap/3.3.1/css/bootstrap-theme.min.css">

<!-- Latest compiled and minified JavaScript -->
<script src="https://maxcdn.bootstrapcdn.com/bootstrap/3.3.1/js/bootstrap.min.js"></script>

<style type="text/css">
	/*    --------------------------------------------------
	:: Login Section
	-------------------------------------------------- */
#login {
    padding-top: 50px
}
#login .form-wrap {
    width: 30%;
    margin: 0 auto;
}
#login h1 {
    color: #1fa67b;
    font-size: 18px;
    text-align: center;
    font-weight: bold;
    padding-bottom: 20px;
}
#login .form-group {
    margin-bottom: 25px;
}
#login .checkbox {
    margin-bottom: 20px;
    position: relative;
    -webkit-user-select: none;
    -moz-user-select: none;
    -ms-user-select: none;
    -o-user-select: none;
    user-select: none;
}
#login .checkbox.show:before {
    content: '\e013';
    color: #1fa67b;
    font-size: 17px;
    margin: 1px 0 0 3px;
    position: absolute;
    pointer-events: none;
    font-family: 'Glyphicons Halflings';
}
#login .checkbox .character-checkbox {
    width: 25px;
    height: 25px;
    cursor: pointer;
    border-radius: 3px;
    border: 1px solid #ccc;
    vertical-align: middle;
    display: inline-block;
}
#login .checkbox .label {
    color: #6d6d6d;
    font-size: 13px;
    font-weight: normal;
}
#login .btn.btn-custom {
    font-size: 14px;
	margin-bottom: 20px;
}
#login .forget {
    font-size: 13px;
	text-align: center;
	display: block;
}

/*    --------------------------------------------------
	:: Inputs & Buttons
	-------------------------------------------------- */
.form-control {
    color: #212121;
}
.btn-custom {
    color: #fff;
	background-color: #1fa67b;
}
.btn-custom:hover,
.btn-custom:focus {
    color: #fff;
}

/*    --------------------------------------------------
    :: Footer
	-------------------------------------------------- */
#footer {
    color: #6d6d6d;
    font-size: 12px;
    text-align: center;
}
#footer p {
    margin-bottom: 0;
}
#footer a {
    color: inherit;
}
</style>
<section id="login">
    <div class="container">
    	<div class="row">
    	    <div class="col-xs-12">
        	    <div class="form-wrap">
                <h1>Image Upload</h1>
                	{{ Form::open(array('url' => '/upload','files' => true)) }}

 						<ul class="errors">
 						@foreach($errors->all() as $message)
 							<li>{{ $message }}</li>
 						@endforeach
 						</ul>

					 	<div class="form-group">
                			{{ Form::label('avatar', 'Avatar',array('class' => 'sr-only')) }}
					    	{{ Form::file('avatar') }}
                		</div>


					    {{ Form::submit('Upload', array('class' => 'btn btn-custom btn-lg btn-block')) }}

					{{ Form::close() }}

        	    </div>
    		</div> <!-- /.col-xs-12 -->
    	</div> <!-- /.row -->
    </div> <!-- /.container -->
</section>
This Image upload form was built by using laravel 4 Form helpers to generate a simple form with image upload input type by setting ‘files’ => true parameter.
When we accessed the view using our route url http://domain.com/.
Post Action in Laravel 4 Route or Controller
Let’s dive into the post action code, but before that let’s check whether the image was uploaded or not to do operations on that image file.
- Check if image was uploaded or not
- Let’s find out the file and move it onto our server
- Using the path of the image on our server, open and resize our Image
- Save the resize image
Let’s implement these steps either in our Route or Controller
Route::post('/upload', function(){

	if (Input::hasFile('avatar'))
	{
	    $file = Input::file('avatar');
	    $file->move('uploads', $file->getClientOriginalName());
	}
});
The above code covers first 2 steps. We check if a image file named avatar is present or not. If so we move that image into the uploads directory keeping the name it was uploaded with.
Adding Intervention for Image Resizing
To get started with Intervention, add it to our composer.json file.
"require": {
		"laravel/framework": "4.2.*",
		"intervention/image": "dev-master"
	},
And run composer update from the root of our project
composer update
Next we have to add providers and array aliases names for Intervention package in app/config/app.php file
'Intervention\Image\ImageServiceProvider'

'Image' => 'Intervention\Image\Facades\Image'
Resizing Images
With Intervention package installed, we simply need to call the methods to resize image and save it into our server.
Route::post('/upload', function(){

	if (Input::hasFile('avatar'))
	{
	    $file = Input::file('avatar');
	    $file->move('uploads', $file->getClientOriginalName());

	    $image = Image::make(sprintf('uploads/%s', $file->getClientOriginalName()))->resize(200, 200)->save();
	}
});
That’s it we have resized the image and saved the image at public/uploads directory. We can add watermark to the image also using another method called insert().
$img->insert('public/watermark.png');
There are lot of other methods we can try from Image Intervention package please check official documentation.
Thanks
Tutorial Categories:


Great!
Upload image, resize default code php.
You customizing auto rezie. Thank
Can you help me in laravel php problems like upload images and session