A Handy Guide on Creating a Simple iPhone App in Xcode For Beginners
Observing the incessant rise in the demand for iPhone apps, it’s not surprising to see novice developers jumping on the iOS app development services bandwagon. Just as you may know, Xcode is the IDE (Integrated Development Environment) that comes with a suite of tools that helps in building an application. You can find plenty of tutorials and resources online to learn the process of iPhone app creation in Xcode, but let’s face the hard truth, most of the resources are difficult to understand.
This post will help you learn about the basics of creating a simple iPhone app in Xcode.
Let’s Begin With Coding Process
Xcode comes shipped with several pre-made app templates. Most of the templates contains interface and source code files that have already been configured. In order to start with the process of creating an iPhone app, we’ll work with the most basic template (also known as Single View Application). Using such a template will help you understand the basic structure of an iPhone-based application. Let’s have a look at the step-by-step instructions to understand how you can build a simple iPhone app:
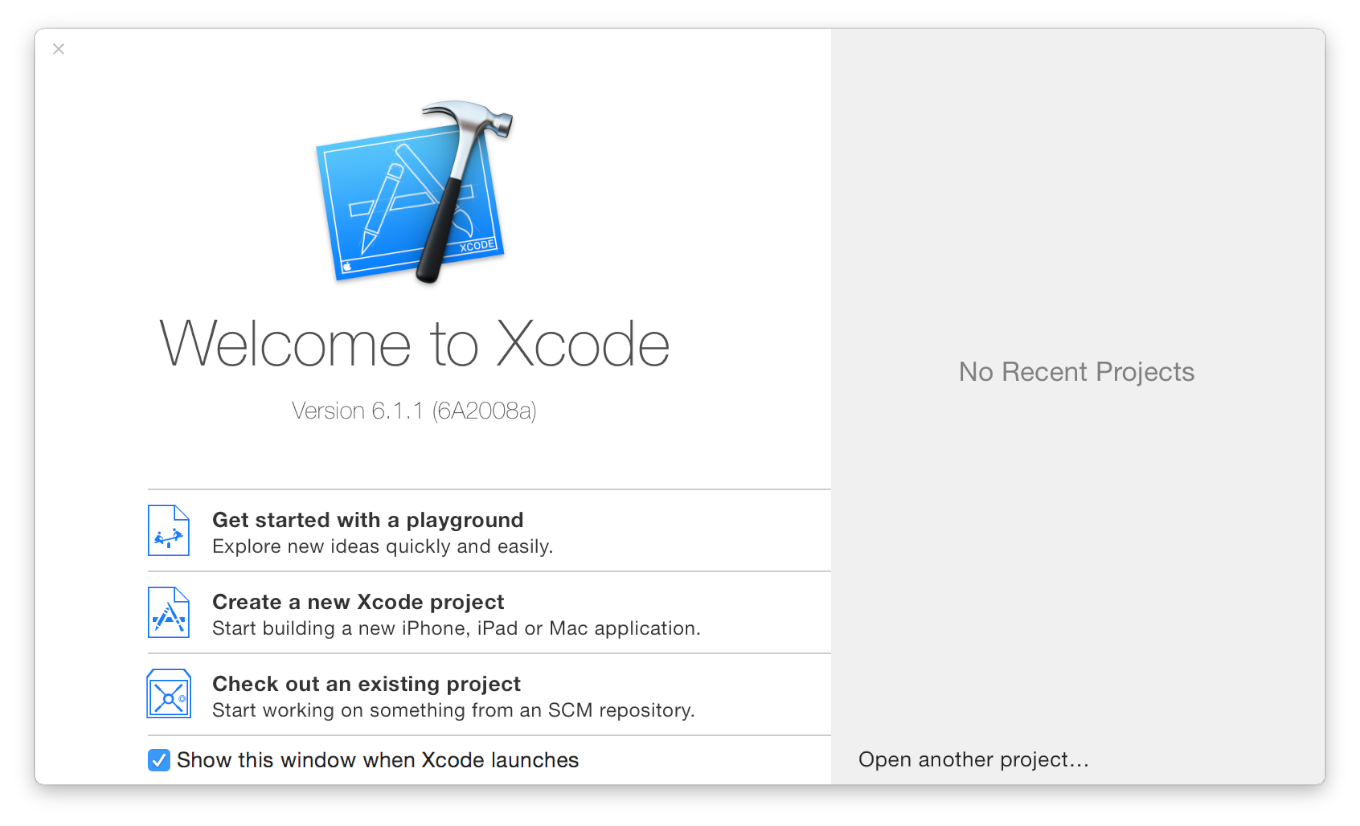
Step 1 – The very first thing you need to do is to launch Xcode, by navigating to the /Applications directory. This will open up an Xcode Welcome dialog as shown below:
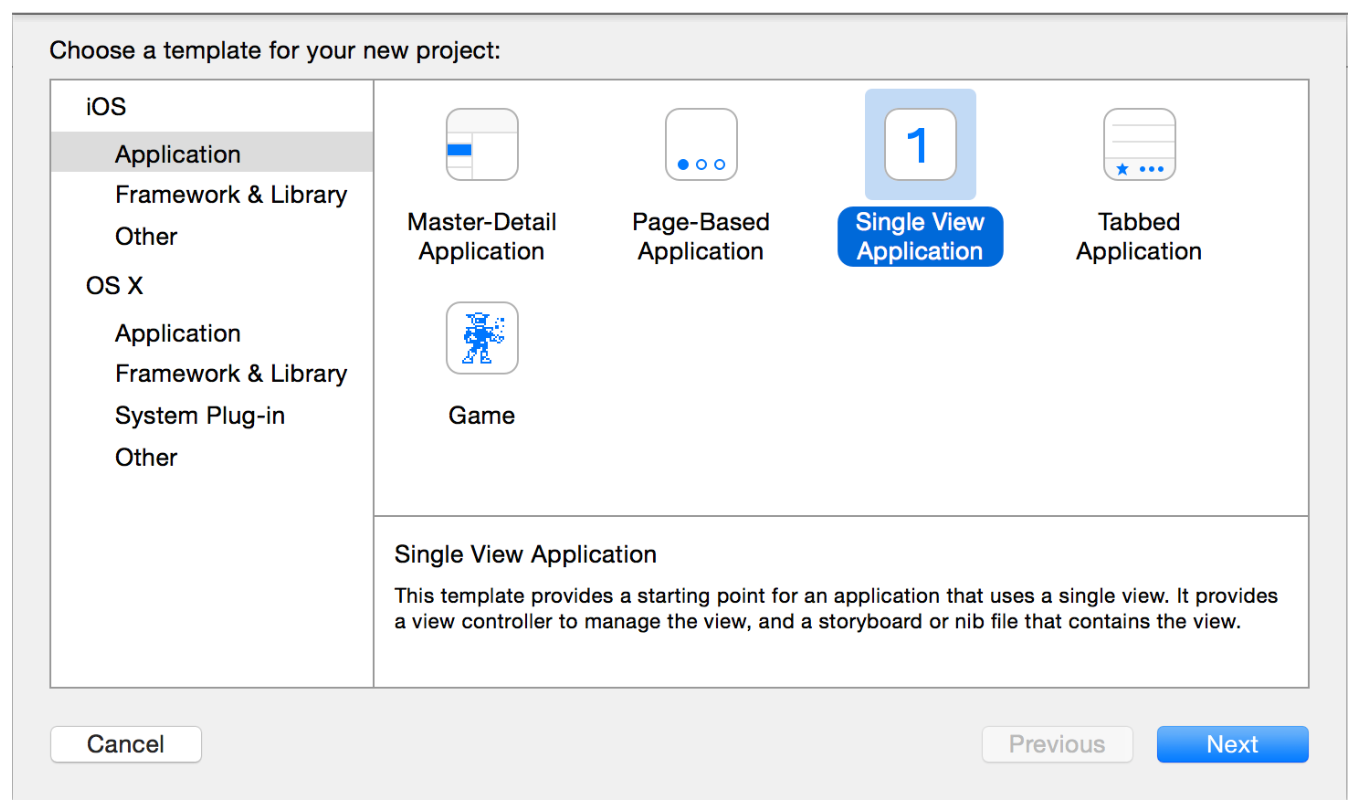
Step 2 – To start the process of building your app, we’ll need to click on “Create a new Xcode project”. Xcode will open up a new window displaying several project templates, among which you need to choose “Single View Application”. And then, click on the “Next” button.
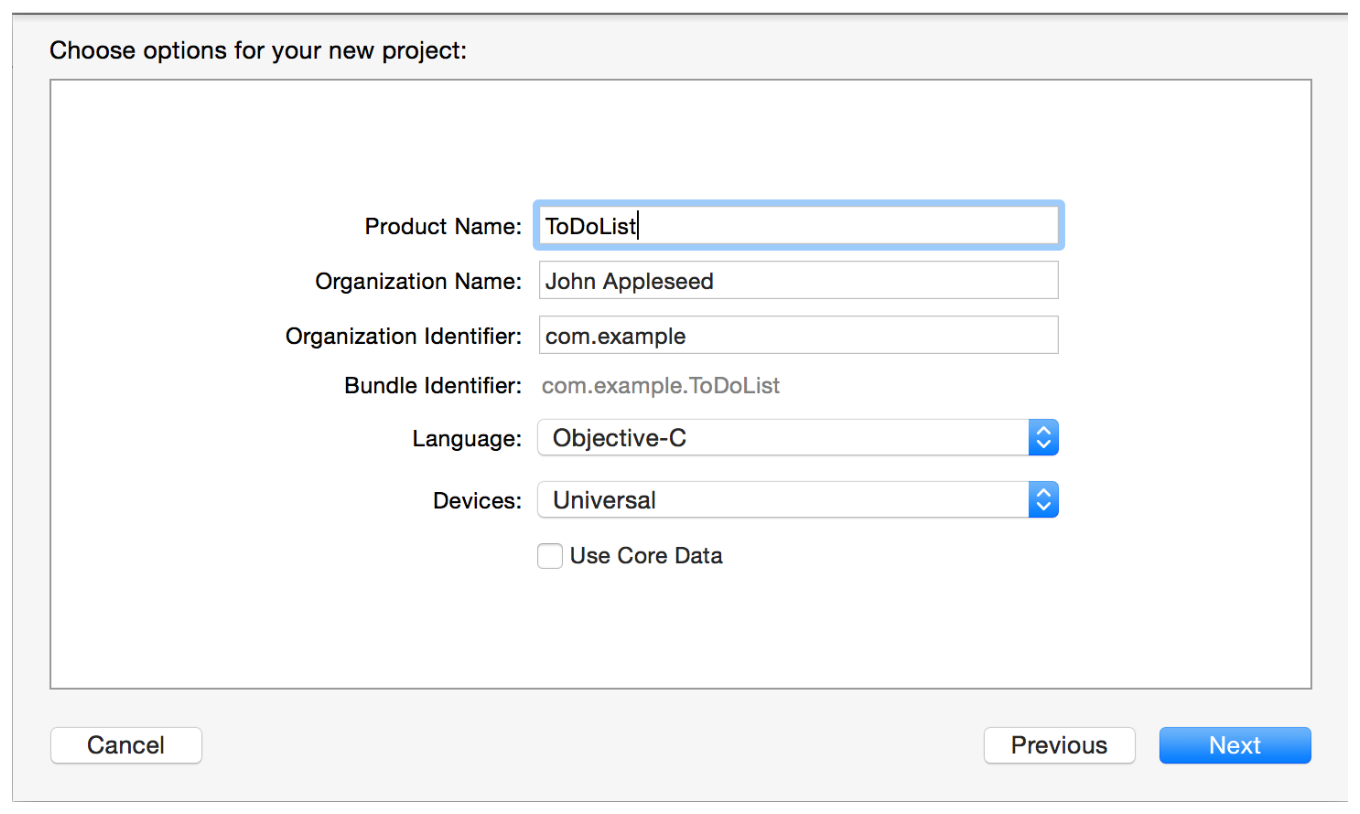
Step 3 – A new dialog box will appear, wherein you will have to enter the name of your app and fill in some additional options, as listed below:http://blog.designs.codes/author/addison_cohen/
- Product Name: It is the name assigned for our project and application. Set the name to ToDoList or any other name as you like.
- Organization Name: In this filed, you need to enter the name of your organization. You can even choose to leave this field blank.
- Organization Identifier: It’s nothing but your organization domain name that’s written in a different manner. If you’ve a domain, just enter its name or simply use any default name such as ”com.example” or any other.
- Bundle Identifier: The value of this field gets auto-generated on the basis of two fields such as: “product name” and “organization identifier”.
- Language: For creating an iPhone app, we will be using Objective-C programming language.
- Devices: The value of this field is set to “Universal”. This means that we’re creating a universal app that can run on both iPhone as well as iPad devices. But, since we’re creating an iPhone app, make sure to change the selection from Universal to “iPhone”.
- Use Core Data: Just keep this field unselected.
Step 4 – Once you’ve made the required changes, click “Next” and the following “Workspace” dialog box will appear:
In the above dialog box, that appears, click on the location tab and choose the location (ideally pick any folder on your Mac) where you’ll like to save your project. And then, click Create. And Xcode will create your new project on the basis of options you’ve provided so far.
Getting to Know About Xcode
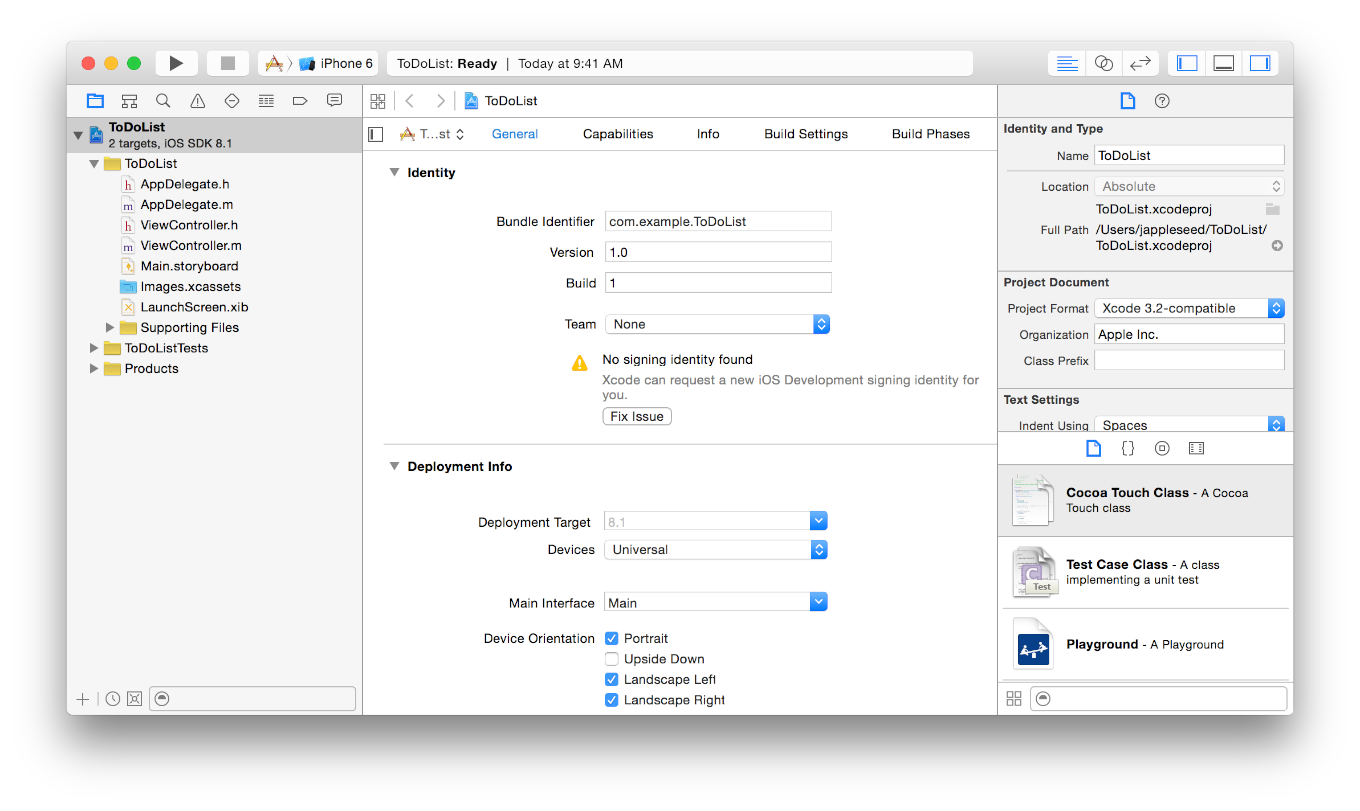
Now prior to getting started with coding an app, let’s first become familiar with the Xcode workspace environment. As you can see in the screenshot below, the workspace is divided into different areas:
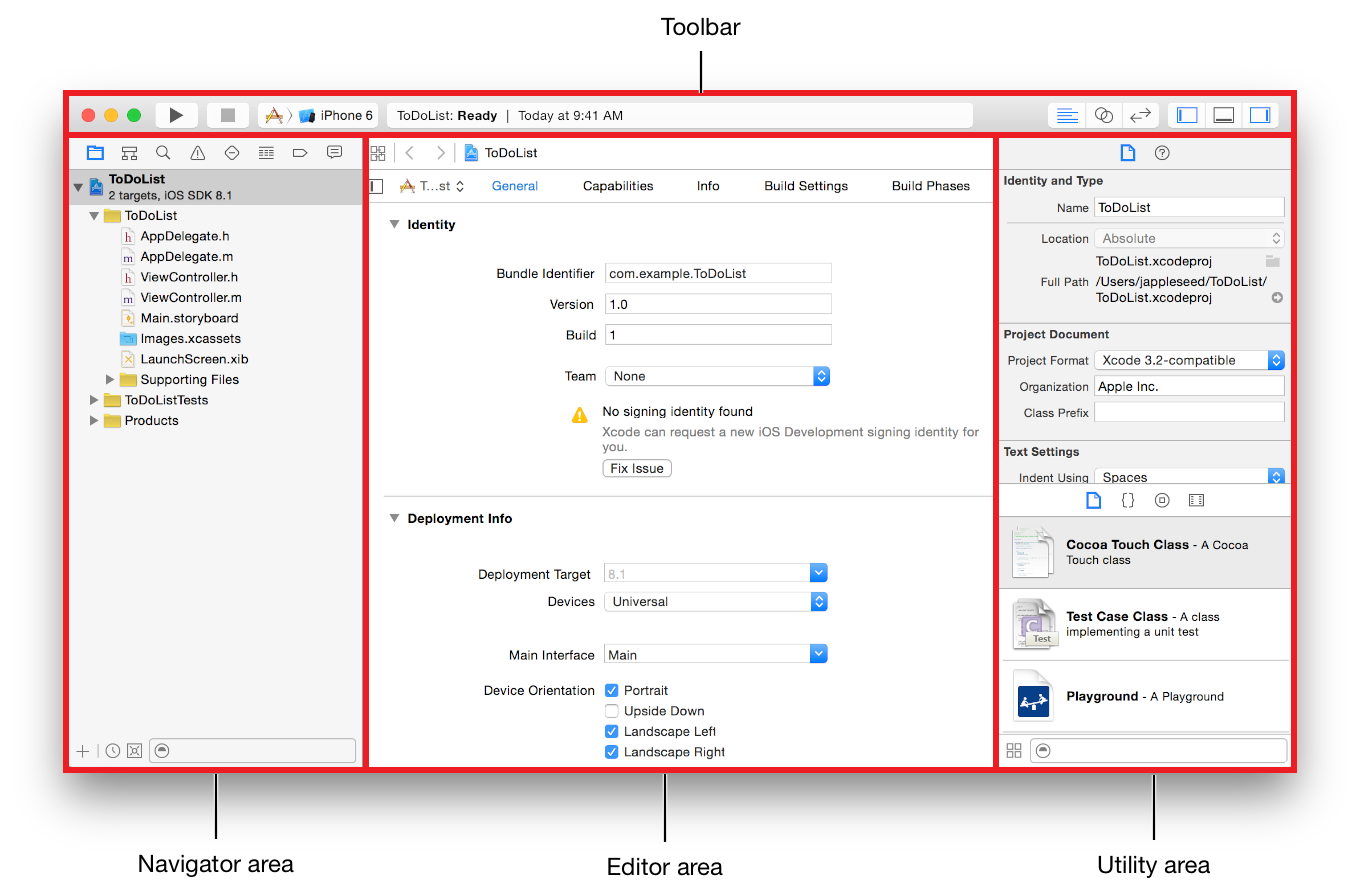
On the left side of the workspace window, you’ll find a navigation area (also referred to as Project navigator). All your project files are saved within this area. In the middle is the editor area, where all the editing is done on user interface, settings, etc.
Next, the utility area helps to display all the properties of your file. It even helps to access “Quick Help”. Last is the toolbar, which helps in providing many functions necessary for running your app.
Running Your App Using the Simulator
Since we’re using a default Xcode template, the Xcode environment will set up automatically. And so, though you haven’t written even a single line of code, you can run your app with help of the iPhone Simulator. Xcode comes integrated with the Simulator – which helps to identify how your app will look and behave – when it is made to run on an iPhone device. In fact, Xcode runs the app in the specific Simulator automatically. Let’s have a view of how the Simulator will look like:
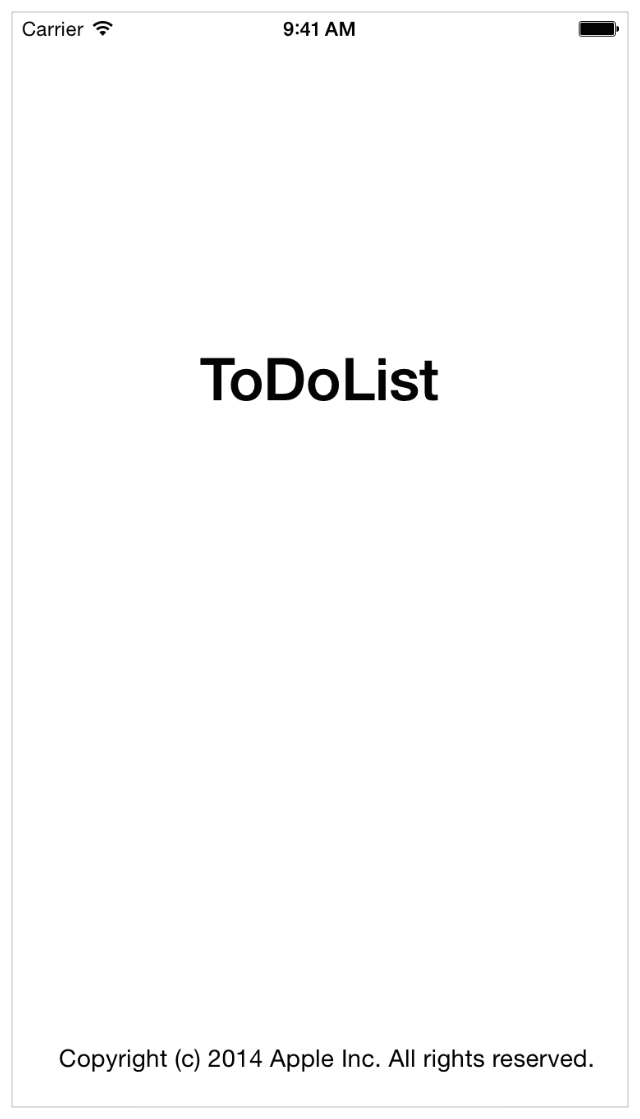
As you can see, your single page template only shows the name of your app and nothing more. To add some functionality, you’ll have to move back on to the coding part.
Getting Back to the Coding Phase
As we have discussed previously, the Single View Application template comes loaded with source code files, helping to set app environment. Remember most of the function performed by the app will be saved in the UIApplicationMain function. This function is called in the project’s “main.m” source file automatically. You won’t be required to deal with this file directly, however, it’s important to understand how the file works to add inputs to your application.
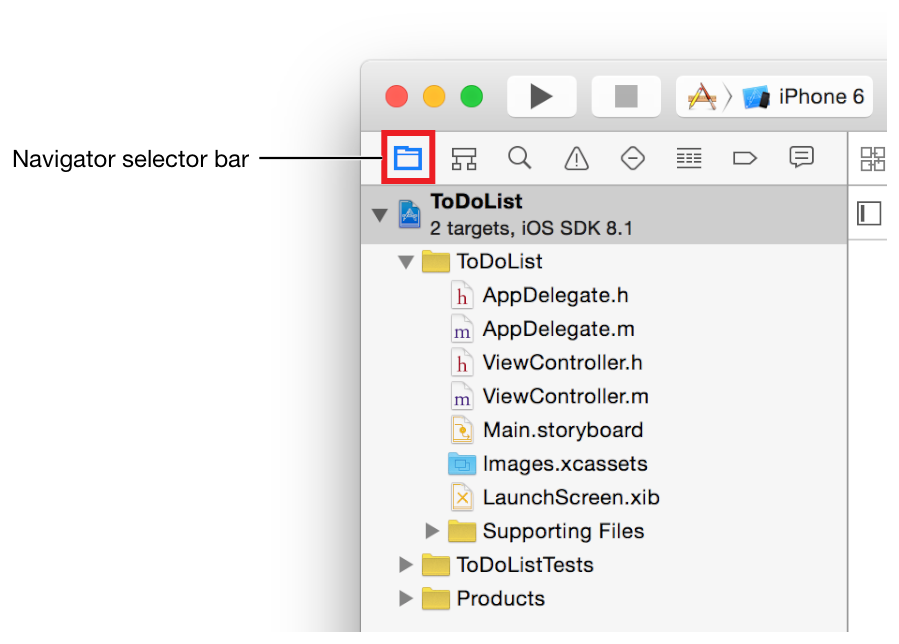
Step 1 – Go to Project Navigator (i.e. navigation area) of the workspace window, and from there select “LaunchScreen.xib”.
Step 2 – Next, open up the Open the supporting Files folder, and click on main.m. This will open the source code of the main.m file:
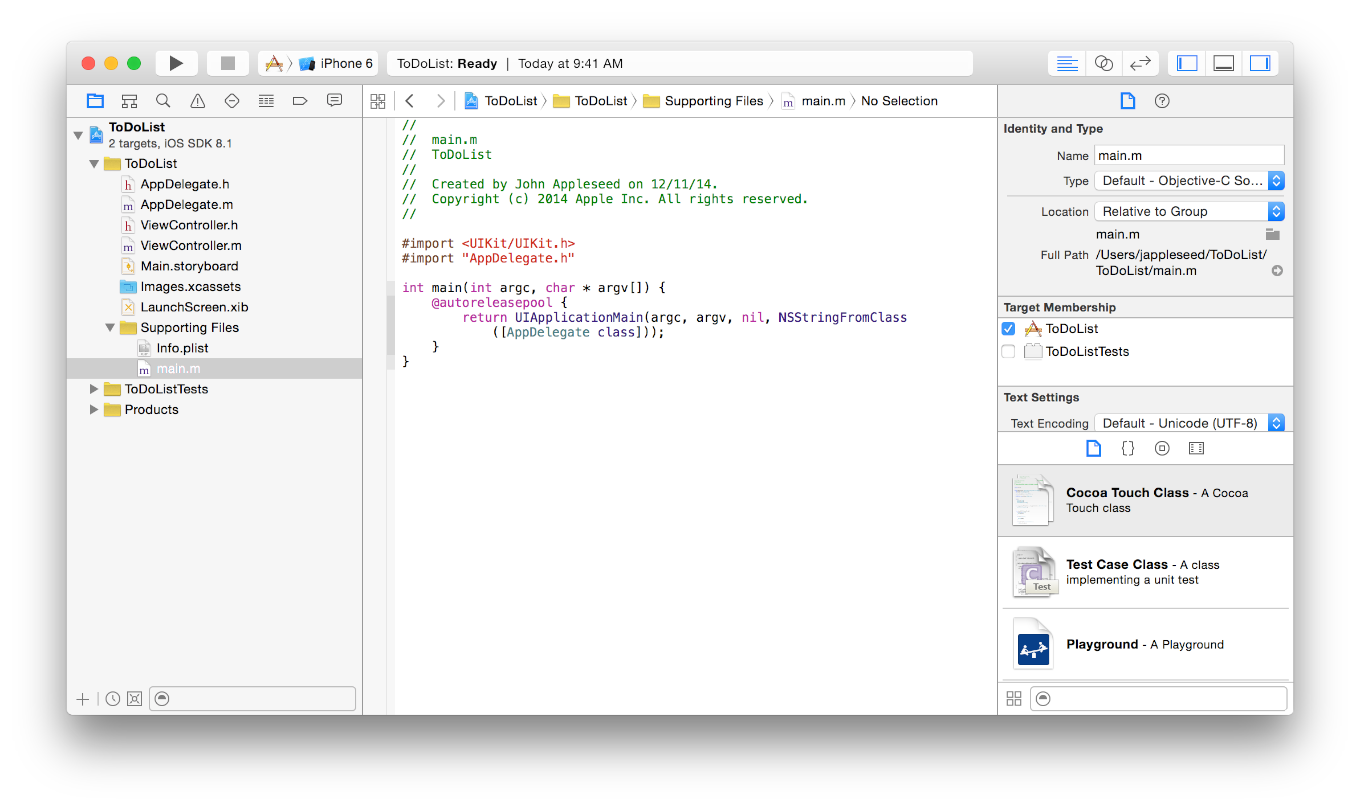
This is where, you’re required to add custom code for making edits to the visual representation of the app interface.
Example Code:
Let’s say that you created a new Xcode Project for your application with the name “Hello World” containing three files:
- HelloWorldViewController.h;
- HelloWorldViewController.m;
- and HelloWorldViewController.xib.
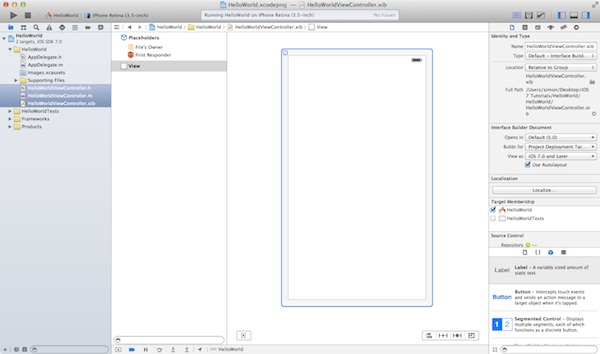
Now when you’ll open up the HelloWorldViewController.xib file, you’ll see an empty view as shown in the screenshot below:
Now, let’s add a button in the middle of the view:
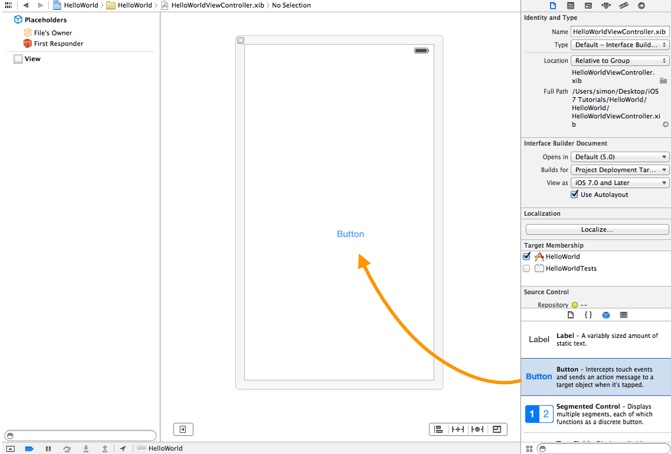
Let’s now rename this button. For this, simply edit the label of the button – and save it to “Hello World”.

Even after running the app, you’ll see a blank screen. That’s because, we haven’t asked the app to load the new view. In that case, we’ll have to add a few lines of code in your app file: HelloWorldViewController.h.
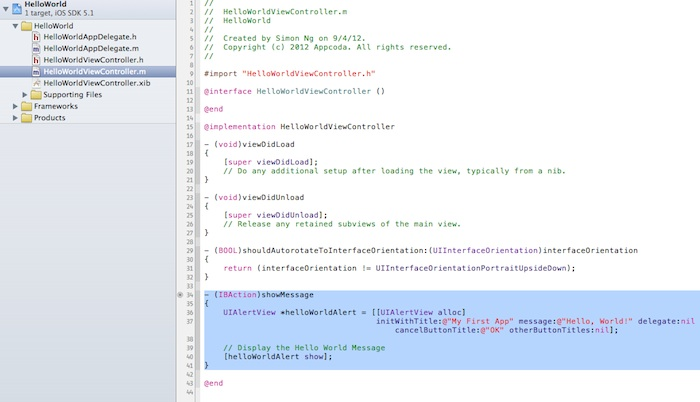
Simply add the following code just before the “@end” line (as shown in the above code):
- (IBAction)showMessage
{
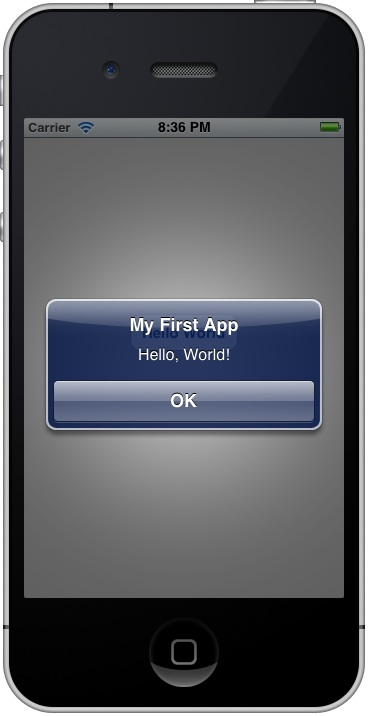
UIAlertView *helloWorldAlert = [[UIAlertView alloc]
initWithTitle:@"My First App" message:@"Hello, World!" delegate:nil cancelButtonTitle:@"OK" otherButtonTitles:nil];
// Display the Hello World Message
[helloWorldAlert show];
}
After adding this code, the “HelloWorldViewController.h “ file in your Xcode workspace environment will look something like:
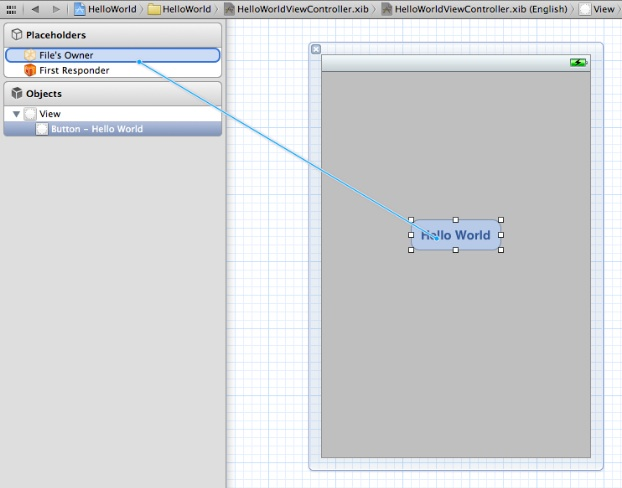
Now, the next thing you need to do is to create a connection between the button (Hello World) with “showMessage” action that we’ve just added in the above code. For doing so, click on the “HelloWorldViewController.xib” file from the navigation pane, and open up the Interface Builder. Press the Control key from your keyboard and hold it, and simultaneously hit the “Hello World” button and drag it to the “File’s Owner” placeholder:
So, now it’s http://blogsizzle.com/time to test your app. If all the things you’ve done till now are correct, then your app will run properly in the Simulator:
Conclusion
So, that’s it you’ve successfully build your first simple iPhone app. Here’s hoping that the post will prove a useful guide you can refer to, for understanding the basics behind app creation using Xcode.
Tutorial Categories: