


How to use the Web Scraper Chrome Extension part 2
This is the second part of the Using the Web Scraper Chrome Extension series, please read the first part to see how to perform a basic content scraping. After you have scraped the content and the popup closes, you have to click on the Sitemap tab -> Export data as CSV.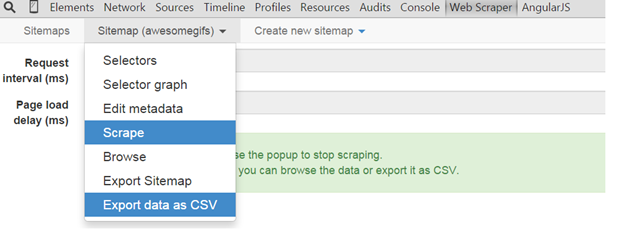
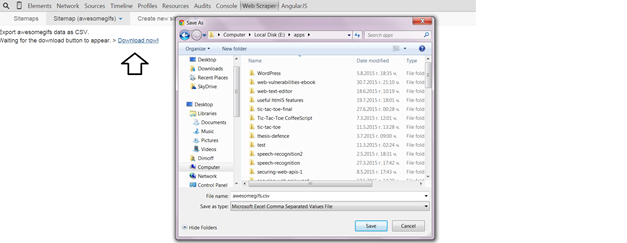
Next, click on Download now and choose where to save the .csv file:
The .csv file should look something like that:
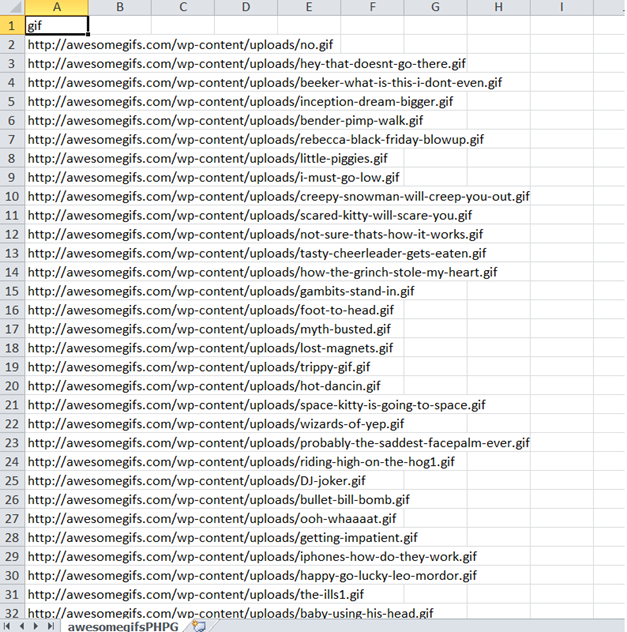
It would contain only one column called gif (the id of our selector) and it will have many rows containing the URL to the gif.
Create a simple MySQL table called awesomegifs with the structure that our csv file has: It would only need two columns, id which auto increments and which is a primary key and a url column which is a VARCHAR and would contain the URL of the gifs, here is the raw SQL for it:
CREATE TABLE IF NOT EXISTS `awesomegifs` (
`url` varchar(255) CHARACTER SET utf8 NOT NULL,
`id` int(11) NOT NULL AUTO_INCREMENT,
PRIMARY KEY (`id`)
) ENGINE=InnoDB DEFAULT CHARSET=utf8 AUTO_INCREMENT=1;
It is important that the id is the last column because we want to assign to the columns in the table exactly as they are ordered in the .csv file. In our case, we have one column called gif in our .csv file and it will be assigned to the first column – url – in our table. The second column id, would not be assigned any value when loading the data from the .csv file to the table and it will auto increment by default.
Now, execute the following SQL command but add the proper path to the .csv file:
LOAD DATA INFILE 'E:/apps/awesomegifs.csv'
INTO TABLE awesomegifs
FIELDS TERMINATED BY ','
ENCLOSED BY '"'
LINES TERMINATED BY '\n'
IGNORE 1 ROWS
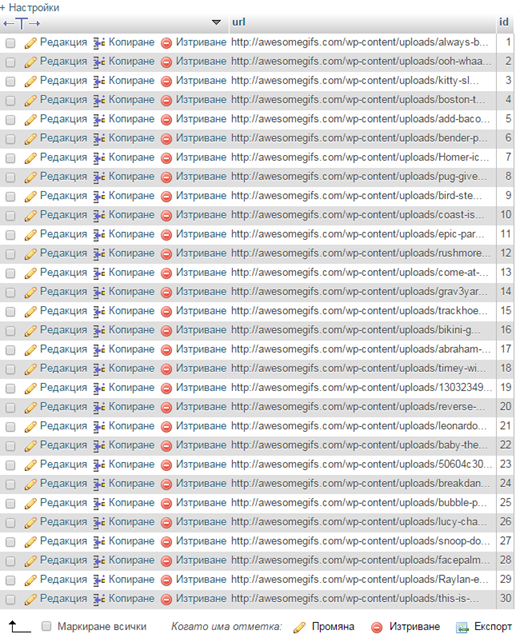
And, voila, we have 758 rows inserted.

The image below shows how our table looks after the .csv file has been loaded into our table:
Finally, you have your first website scraped with the Web Scraper extension.
Let us examine a more complicated website now. Let us say we want to scrape all jokes from the laughfactory.com website. We create a new sitemap, add the name of laughfactory and a starting URL of http://www.laughfactory.com/jokes/

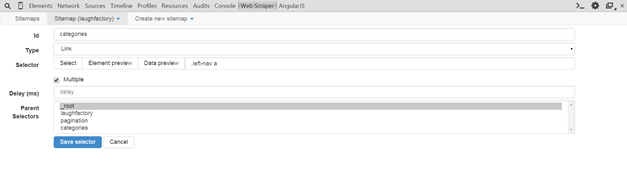
Then, we create a new selector with the type of “Link” and the checkbox Multiple checked. This tells Web Scraper to go over each link that matches the selector on the page http://www.laughfactory.com/jokes/ . Our CSS selector is .left-nav a which will make Web Scraper go through each link (category of jokes) on the laughfactory/jokes/ webpage.
Then, we click on the newly created categories selector and create a nested selector (selector within the categories selector) called pagination. This will instruct Web Scraper first to open up a category and follow all pagination links for each category:

Our pagination selector is .pagination li a which points to each link in the pagination and is again of type Link and Multiple. We have selected multiple because there will be more than one link in the pagination container and we have selected a type of link because we want Web Scraper to follow each link located in the pagination container.
Finally, we want to extract all jokes located on all pages within all categories. Therefore, when Web Scraper has followed some category and is located on some of the pages with jokes (we need another nested selector located in _root / categories/ pagination) we create a Text selector with Multiple checked because there is more than one joke on a page. Our CSS selector in this case is .joke3-pop-box p

As with the previous example, you now have to click on Scrape, wait, save as a .csv file and load the data into a MySQL table and you are ready to use it in your applications.
Here is a how a simple MySQL table looks like (in terms of structure and content) with the resulting data loaded.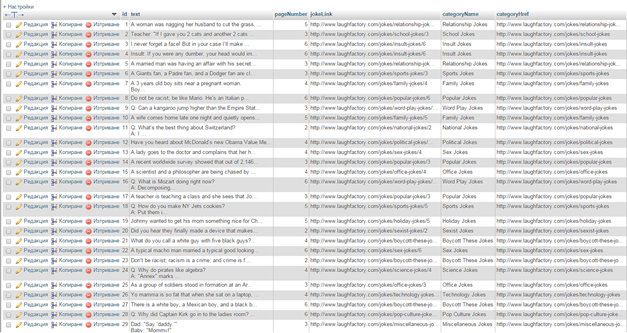
What are you waiting for? Go scrape the web!
Tutorial Categories:


Excellent topics with good explanation.
I have tried to get data from filpkart.com for products in there catalogs but not success until now, appreciate if you can demo it as it should be some advance to create sitemap for that. Thanks.