


Your first Angular.js note-keeping app part 2 Demo, Download
In our main page we loop through the array with note objects and display them with the help of Angular. We make the content inside the notes to be editable, so that users can edit whichever note they want and just click on save in order for the change to persist after reload.
<div class=" panel-heading">
                <span contenteditable="false" ng-click="notes.deleteNote($index)" class="glyphicon glyphicon-remove"></span>
                <span contenteditable="false"  ng-click="notes.editNote($index, notes.getNoteText($index))" class="glyphicon glyphicon-save"></span>
                <h1 contenteditable  class="text-center">{{ note.title }}
                </h1>
            </div>
We are taking advantage of $index which gives us the current index while iterating. You saw that in our controller – we set $scope.notes equal to the factory so we could access the properties from the factory using notes.methodName. We use ng-click to perform the actions when the elements are clicked on and show them, if there are any notes.
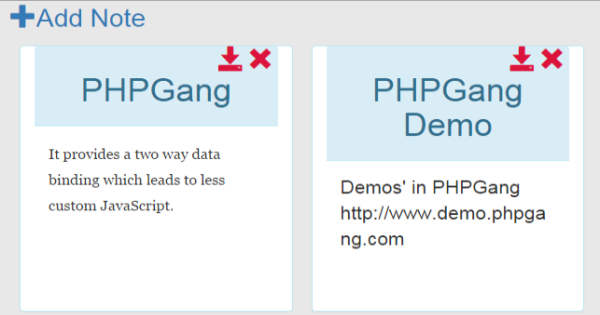
Syntax like {{ note.title }} is called an expression and it prints its result. It also establishes two-way data binding – so whenever you print some variable in that way and change the variable – the new value will be redisplayed.
Form validation in Angular.js
The interface for adding notes is the following:
<a href="#" style="font-size: 2em;"  ng-click="showForm = !showForm"><span class="glyphicon glyphicon-plus"></span>Add Note</a>
        <br>
        <form  ng-submit="notes.saveNote(newNote)" ng-show="showForm" method="post" style="margin: 10px;" class="col-md-6"  name="addNote" novalidate >
            <label for="title">Title:</label>
            <input id="title" class="form-control"  type="text" ng-minlength="4" autocomplete="off" name="title" placeholder="Laundry" required ng-model="newNote.title"/>
            <p class="help-block alert alert-warning" ng-show="addNote.title.$dirty && addNote.title.$invalid">The Note's title must contain at least 4 characters.</p>
            <label for="body">Note's Body:</label>
            <textarea name="body" ng-model="newNote.body" id="body" class="form-control" required ng-minlength="6" placeholder="I have to do the laundry before tomorrow."></textarea>
            <p class="help-block alert alert-warning" ng-show="addNote.body.$dirty && addNote.body.$invalid">The Note's body must contain at least 6 characters.</p>
            <input  ng-disabled="addNote.$invalid" style="margin-top: 5px;" type="submit" value="Add" class="btn btn-lg btn-default"/>
We use an anchor to toggle the form on and off whenever the link is clicked. To do this, we use ng-show based on the value of showForm which gets inverted each time the link is clicked.
Then,as the user is typing, we check if the two fields are filled out and display an error message if the lengths of their input does not match the minimum required length.
Creating a form allows us to access its inputs and the form itself using their names. The input with a name of title inside a form with a name attribute of addNote could be accessed by typing addNote.title.
There are certain utilities we can use in forms. If we use Angular’s validation (ng-required, ng-minlength, ng-maxlength, ng-pattern) is that we get automatic classes applied to the form – ng-dirtywhen the user has started typing, ng-pristine when he has not typed anything yet, ng-valid when each field in the form is valid and ng-invalid when one or more fields are invalid. Similarly, we could access those states for particular inputs as well – addNote.title.$dirty, addNote.title.$error.required and addNote.title.$error.minlength would hold true if the user has typed in the input, if there is a required field that was not filled out or if there were not enough characters in the user’s input. You can give them appropriate message if those booleans hold a truthy value. Similarly, you can useaddNote,title.$invalid or addNote.title.$valid.
In our app we disable users from submitting their notes (the form) if there is an input that is not valid: ng-disabled="addNote.$invalid"
Also, we show the errors only if the user has started typing but the validation does not pass: ng-show="addNote.title.$dirty && addNote.title.$invalid"
We create an object that will store the title and the body of the new note: ng-model="newNote.body" and we pass the entire object on form submission: ng-submit="notes.saveNote(newNote)"
Further reading
Note that there is much more to discover in the Angular world. We have used plenty of the built-in directives but the power of Angular really lies in creating your own directives – what I mean by directives is teaching HTML new elements and attributes with a particular meaning for your app. For example, you could add a <book> </book> element in your app with a custom functionality.
We recommend you to read more on services, directives, providers, values, constants, emitting and broadcasting events and all kinds of other built-in features. Most importantly, read about the$routeProvider and Router UI to begin with creating custom URLs using the HTML5 History API or Hashbang in your SPA.
Start by examining the Angular.js documentation located at: https://docs.angularjs.org/api
Tutorial Categories:


Demo not working
It is working but there might be an issue if you have tried out the previous note-keeping app demo (the one that worked offline). Both note-keeping apps are using a localStorage variable called notes. You would have to type “delete localStorage.notes” in the browser’s console while the demo is opened and then refresh.
Sorry for the inconvenience,
Ivan
To open browser console use below commands
Chrome
Windows: Ctrl + Shift + J
Mac OS: Cmd + Opt + J
Firefox
Windows: Ctrl + Shift + K
Mac OS: Cmd + Opt + J
Internet Explorer
F12 Developer Tools:
F12, then click on the “Console” tab
Safari
Mac OS: Cmd + Opt + C